Animator Shading Tutorial
To start with we need an object to shade.
Click the little cube at bottom of toolbar in select mode.
Then click and drag from the center of the world outward to make a cube.
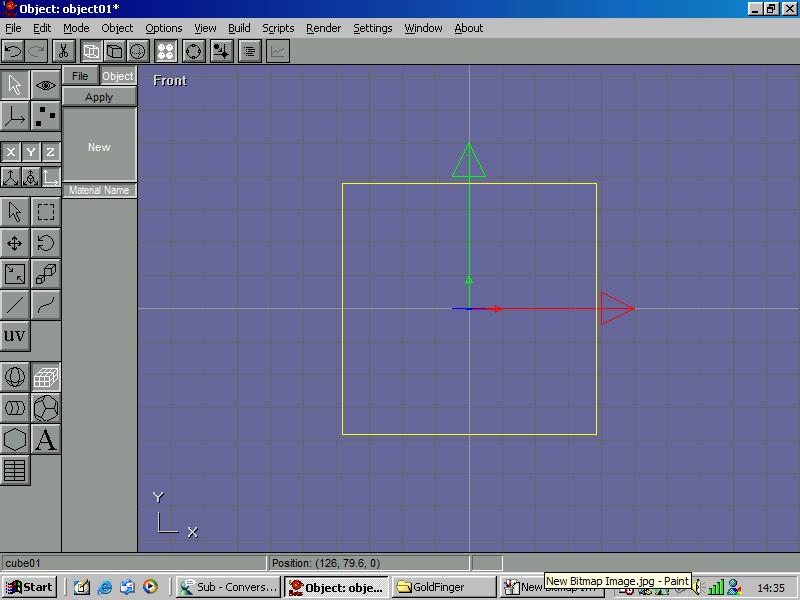
Then you can double click the cube and set size, subdevides and position accuriatly via textual input.
However before we can shade the cube, we need to make it a mesh.
To do so, click "Build" then "Convert to mesh".
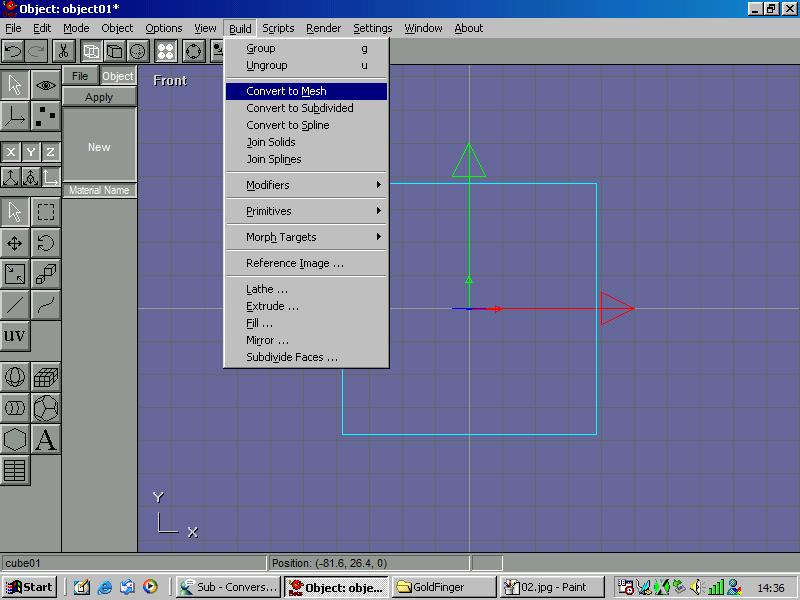
Once you have done this we need to make materials.
In the material selection toolbar (Opened via 4 small black balls on upper toolbar) Double Click "New".
This will display a window like below.
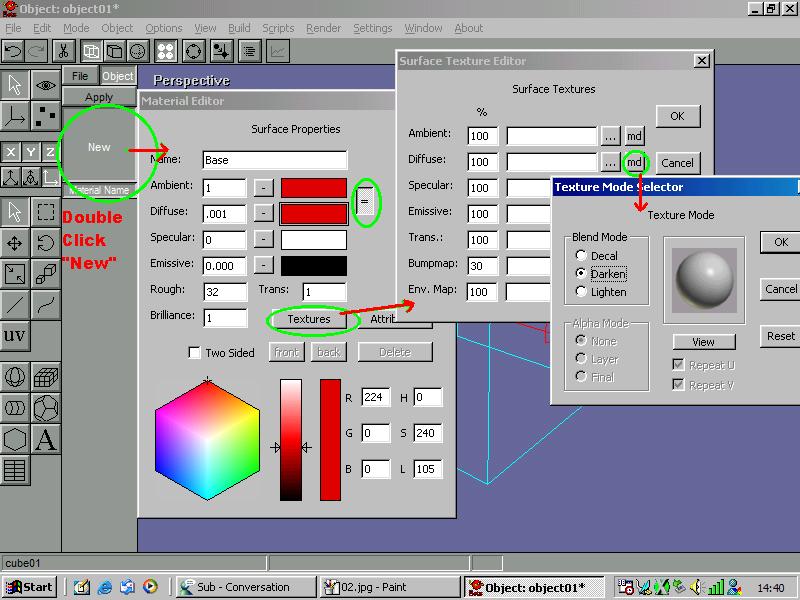
Because GoldenEye does not shade objects by itslef, we need to pre shade them.
To get an idea of how GoldenEye will render an object make sure "=" is pressed and that "Ambiant" it set to "1" and "Diffuse" is set to "0.001" (The reason for this is to dissable Automatic Shading, however setting "Diffuse" to "0" Will cause any BMP Loaded to be unloaded.)
You will also want to Dissable Specular Highlight by setting it to "0" too.
Now you can select your bmp (24bit) by clicking "Textures" and then "..." Next to "Diffuse".
Once you have selected your texture you need to click the "md" button next to "..." and select "Darken" (As selected in image above). Reason for this is because we want the texture to be coloured or shaded as it will be in-game, which is Diffuse colour(0-1) * any pixle colour in question of texture. So a red texture and white diffuse makes red (1* (255, 0, 0) = 255, 0, 0.)
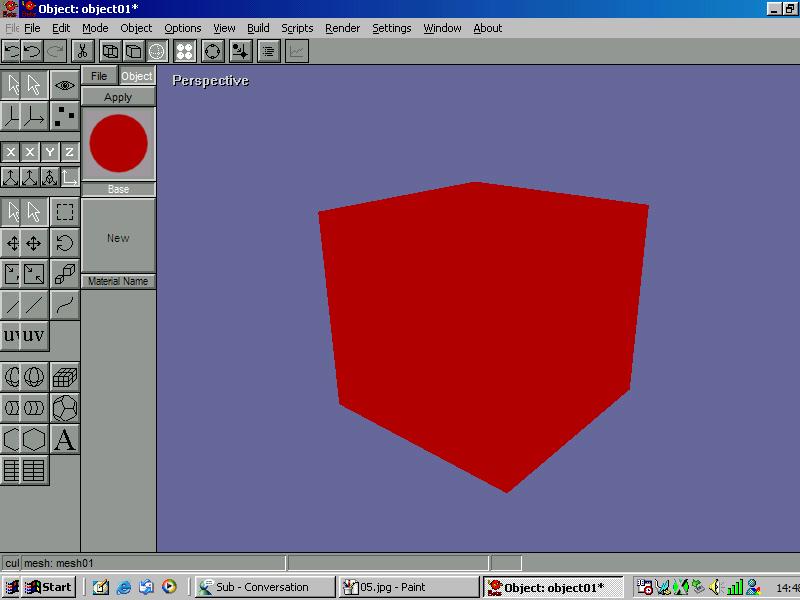
Then click ok untill your back to the cube.
Make sure the cube is still selected and then click the new material ("Base" in my example) and click 'Apply". You will see cube turn red in solid view.
Had we not set the "Diffuse" and "Ambiant" Values to "0.001" and "1" animator would shade Live (Not stored) like so -
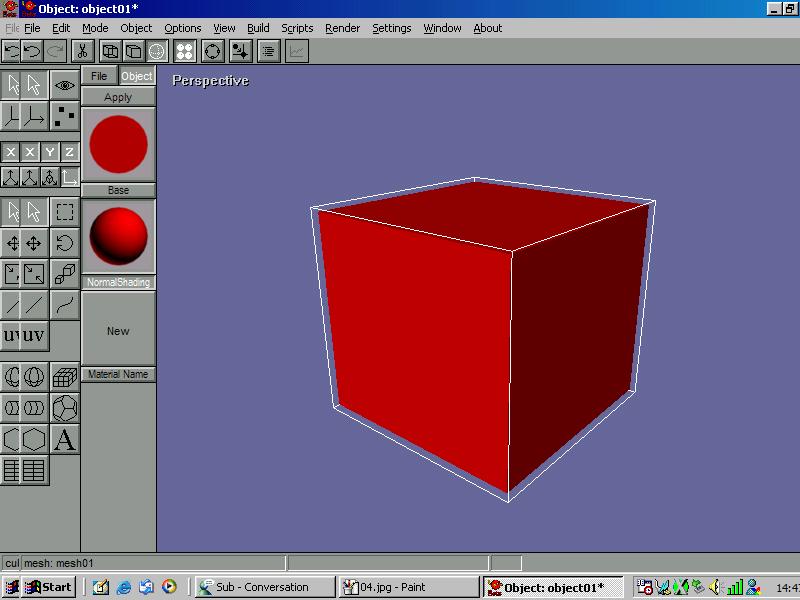
As we forced animator to shade like GoldenEye, you will notice the cube is very bland. So lets Apply our own shading.
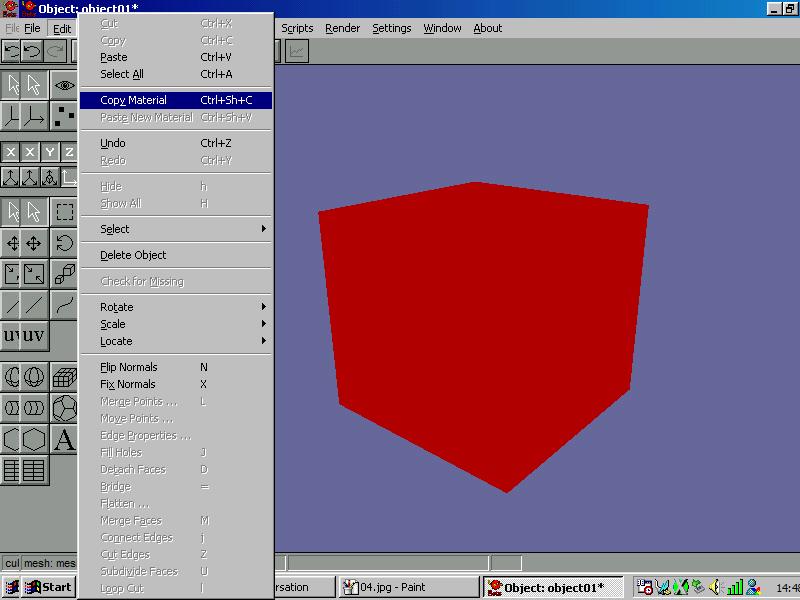
First We need another material, the best way is to go to "Edit" then "Copy Material", then "Edit" and "Paste New Material"
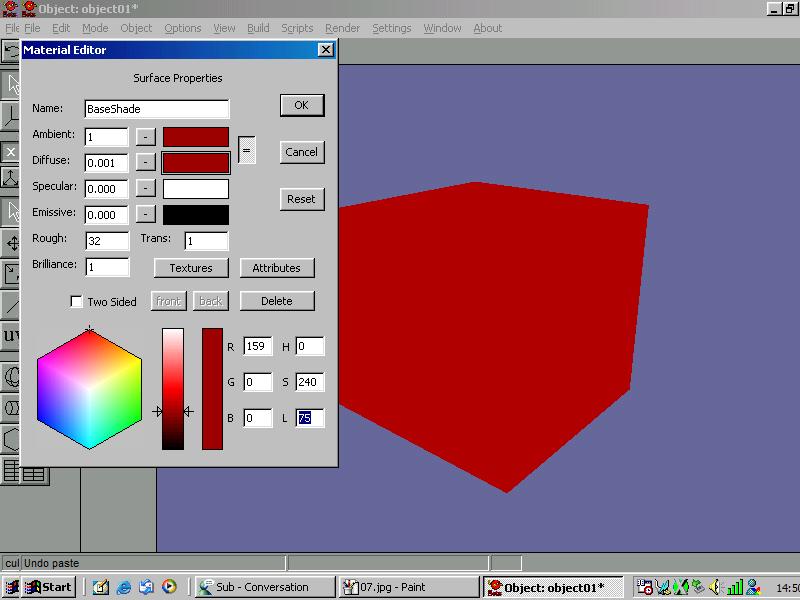
Then Enter a new name like example, BaseShade.
You want to decrease the "L"uminessance of the material and press "OK"
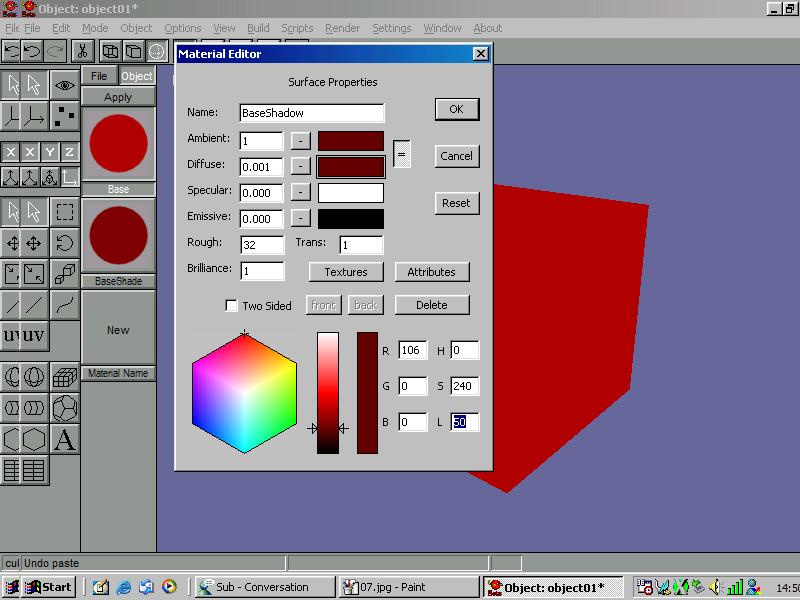
You will notice the new material enters the list on the left.
Repeat the "Paste New Material" and set new name and new "L"uminessance and press "OK"
Now we are going to Apply our shading.
Pick a Lightsource Direction and apply the materials by:
Click "Point Edit Mode" (Red Circle in image below)
Click "Face Edit" (Green Circle in Image Bellow)
Click desired face and Right Click each subsiquent face that you want to apply the same material shading to. If you Left Click all faces will de-select and only the face you click will be selected.
Click a material (Shadow in my example below) And click "Apply" (Blue Circle in Image Below)
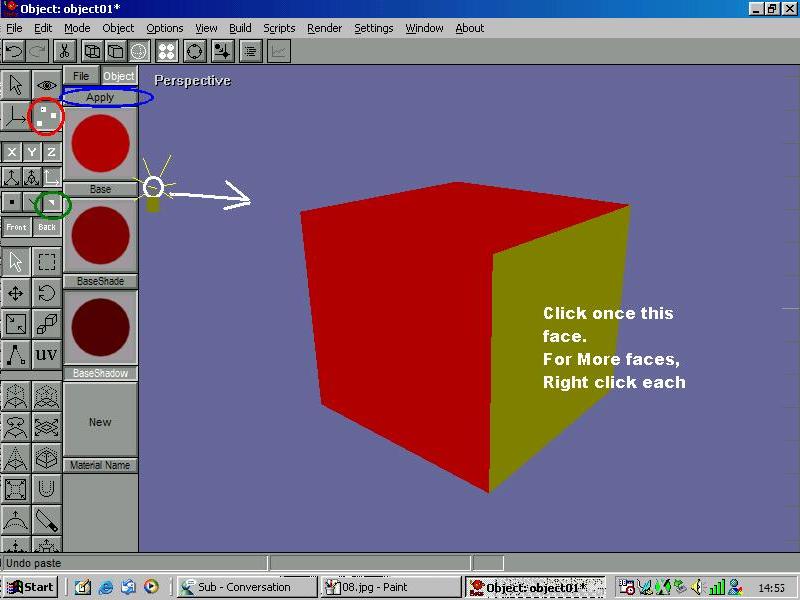
Repeat this for all shades and you will end up with this
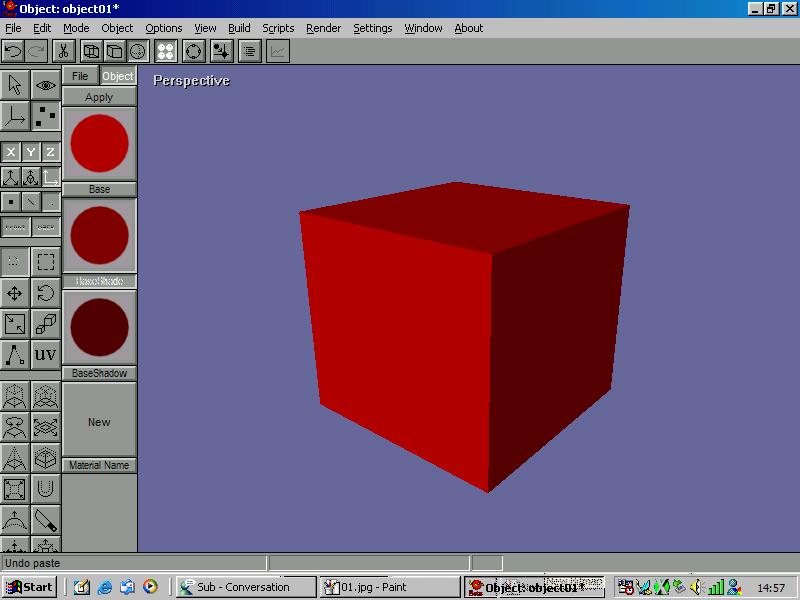
You Will notice that it is remarkably similar to Animator's default shading, So use it as an aid.
Now when your model is imported into GoldenEye it wont look flat, it will be lovely and shaded.